Hi. How can we help you?
(Mobile Version)
To help you enjoy a faster, safer, and more private internet connection, Cloudflare provides the 1.1.1.1 WARP application.
This step-by-step guide will walk you through the process of downloading, installing, and setting up the app on your device.
Step 1:
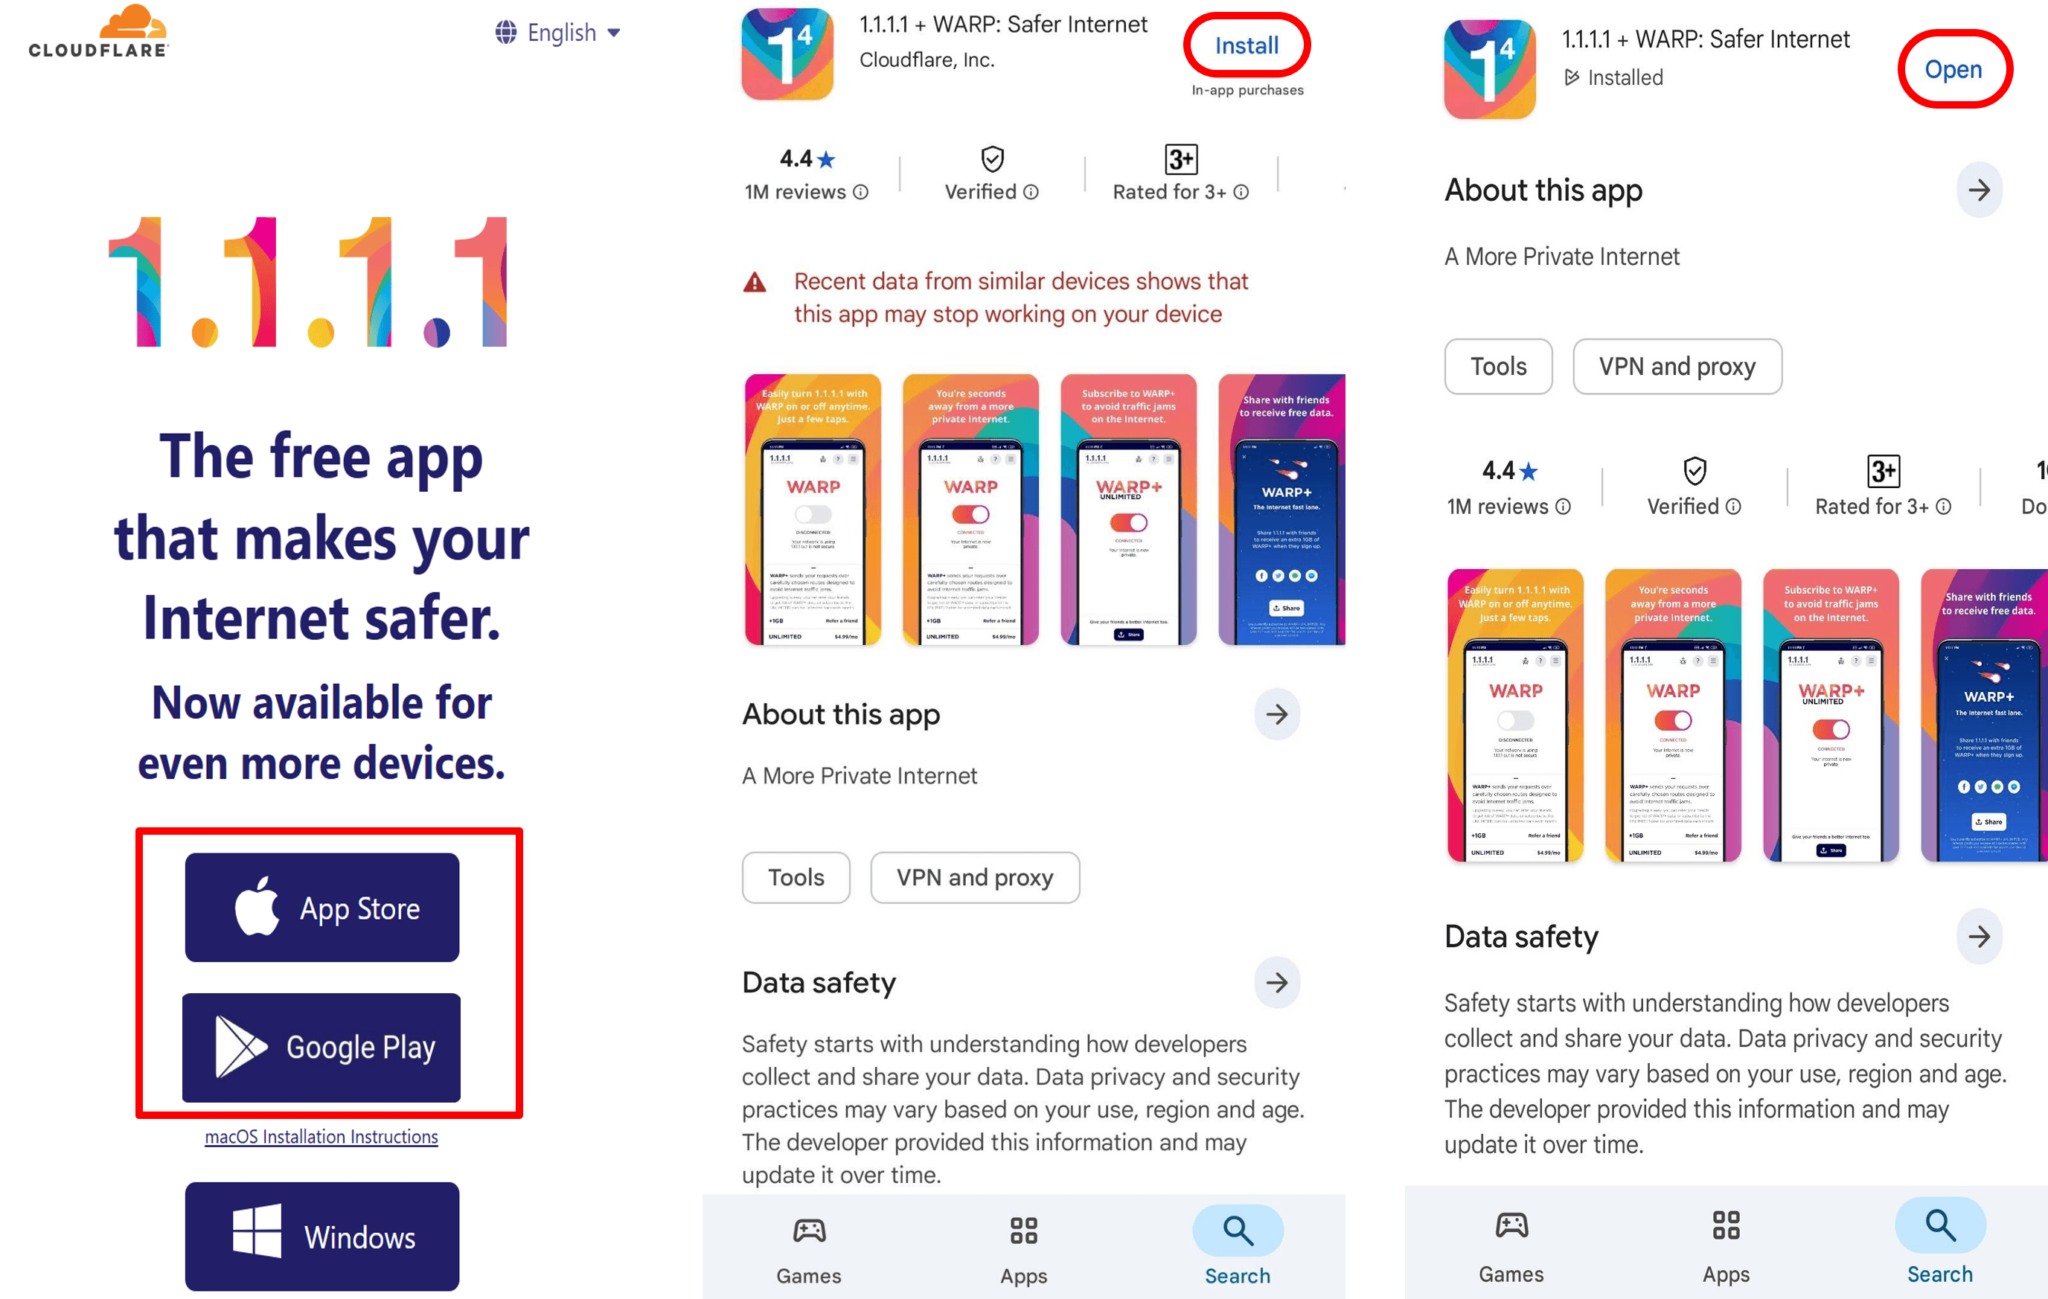
Visit the official Cloudflare 1.1.1.1 website at https://one.one.one.one/ and select the version that matches your device (e.g., iOS, Android, Windows, or macOS).
Step 2:
Click on the Install button to begin the download.
Step 3:
Once the application has been successfully installed, open the app by clicking Open.
Step 4:
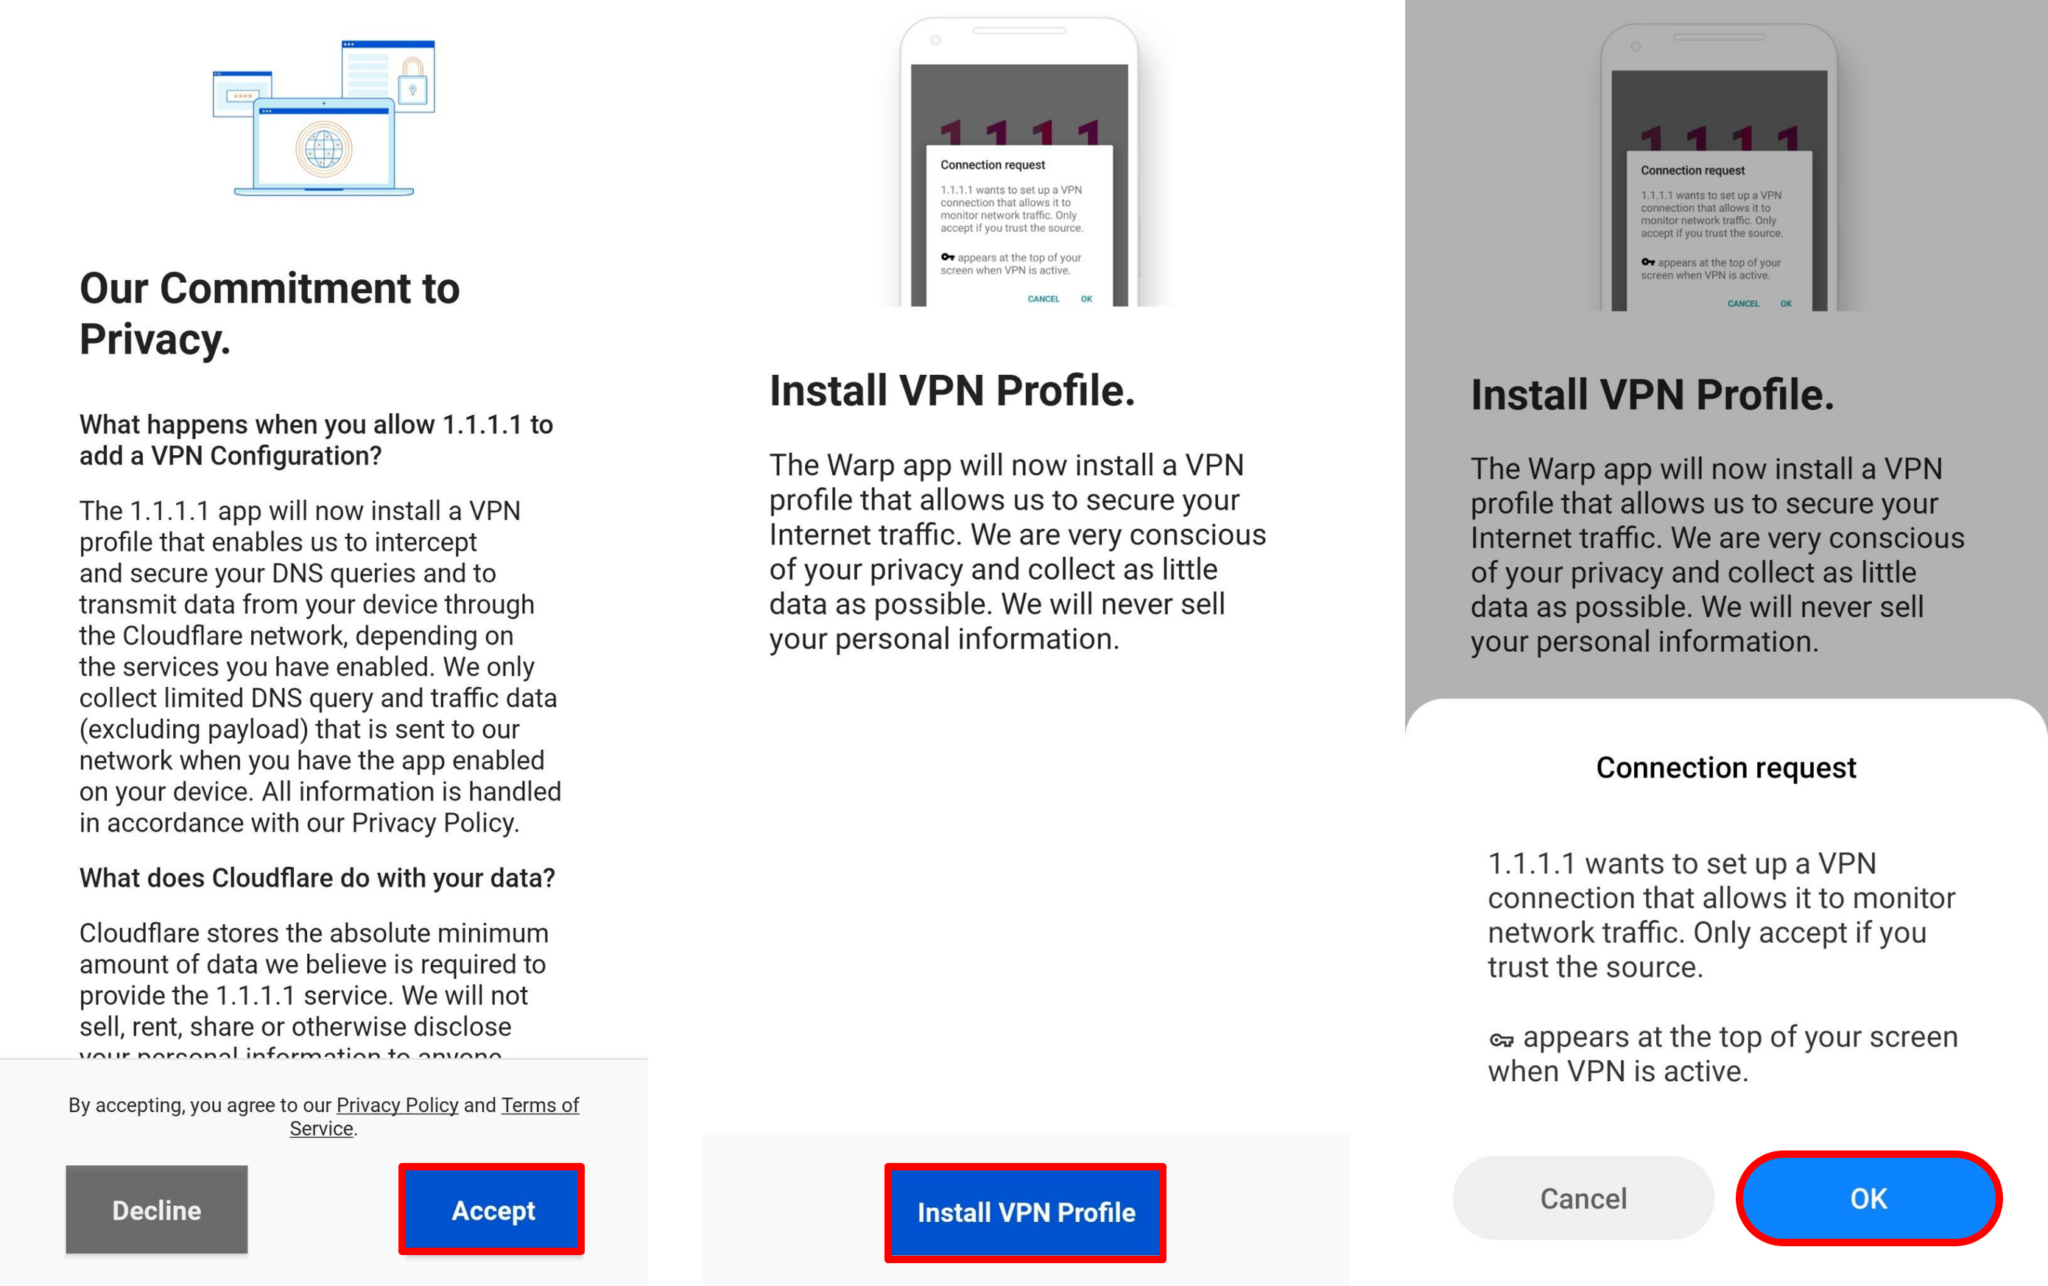
Read through the Privacy Policy and Terms of Service, then click Accept to proceed.
Step 5:
When prompted, select Install VPN Profile and confirm by clicking OK. This permission is required for the app to function.
Step 6:
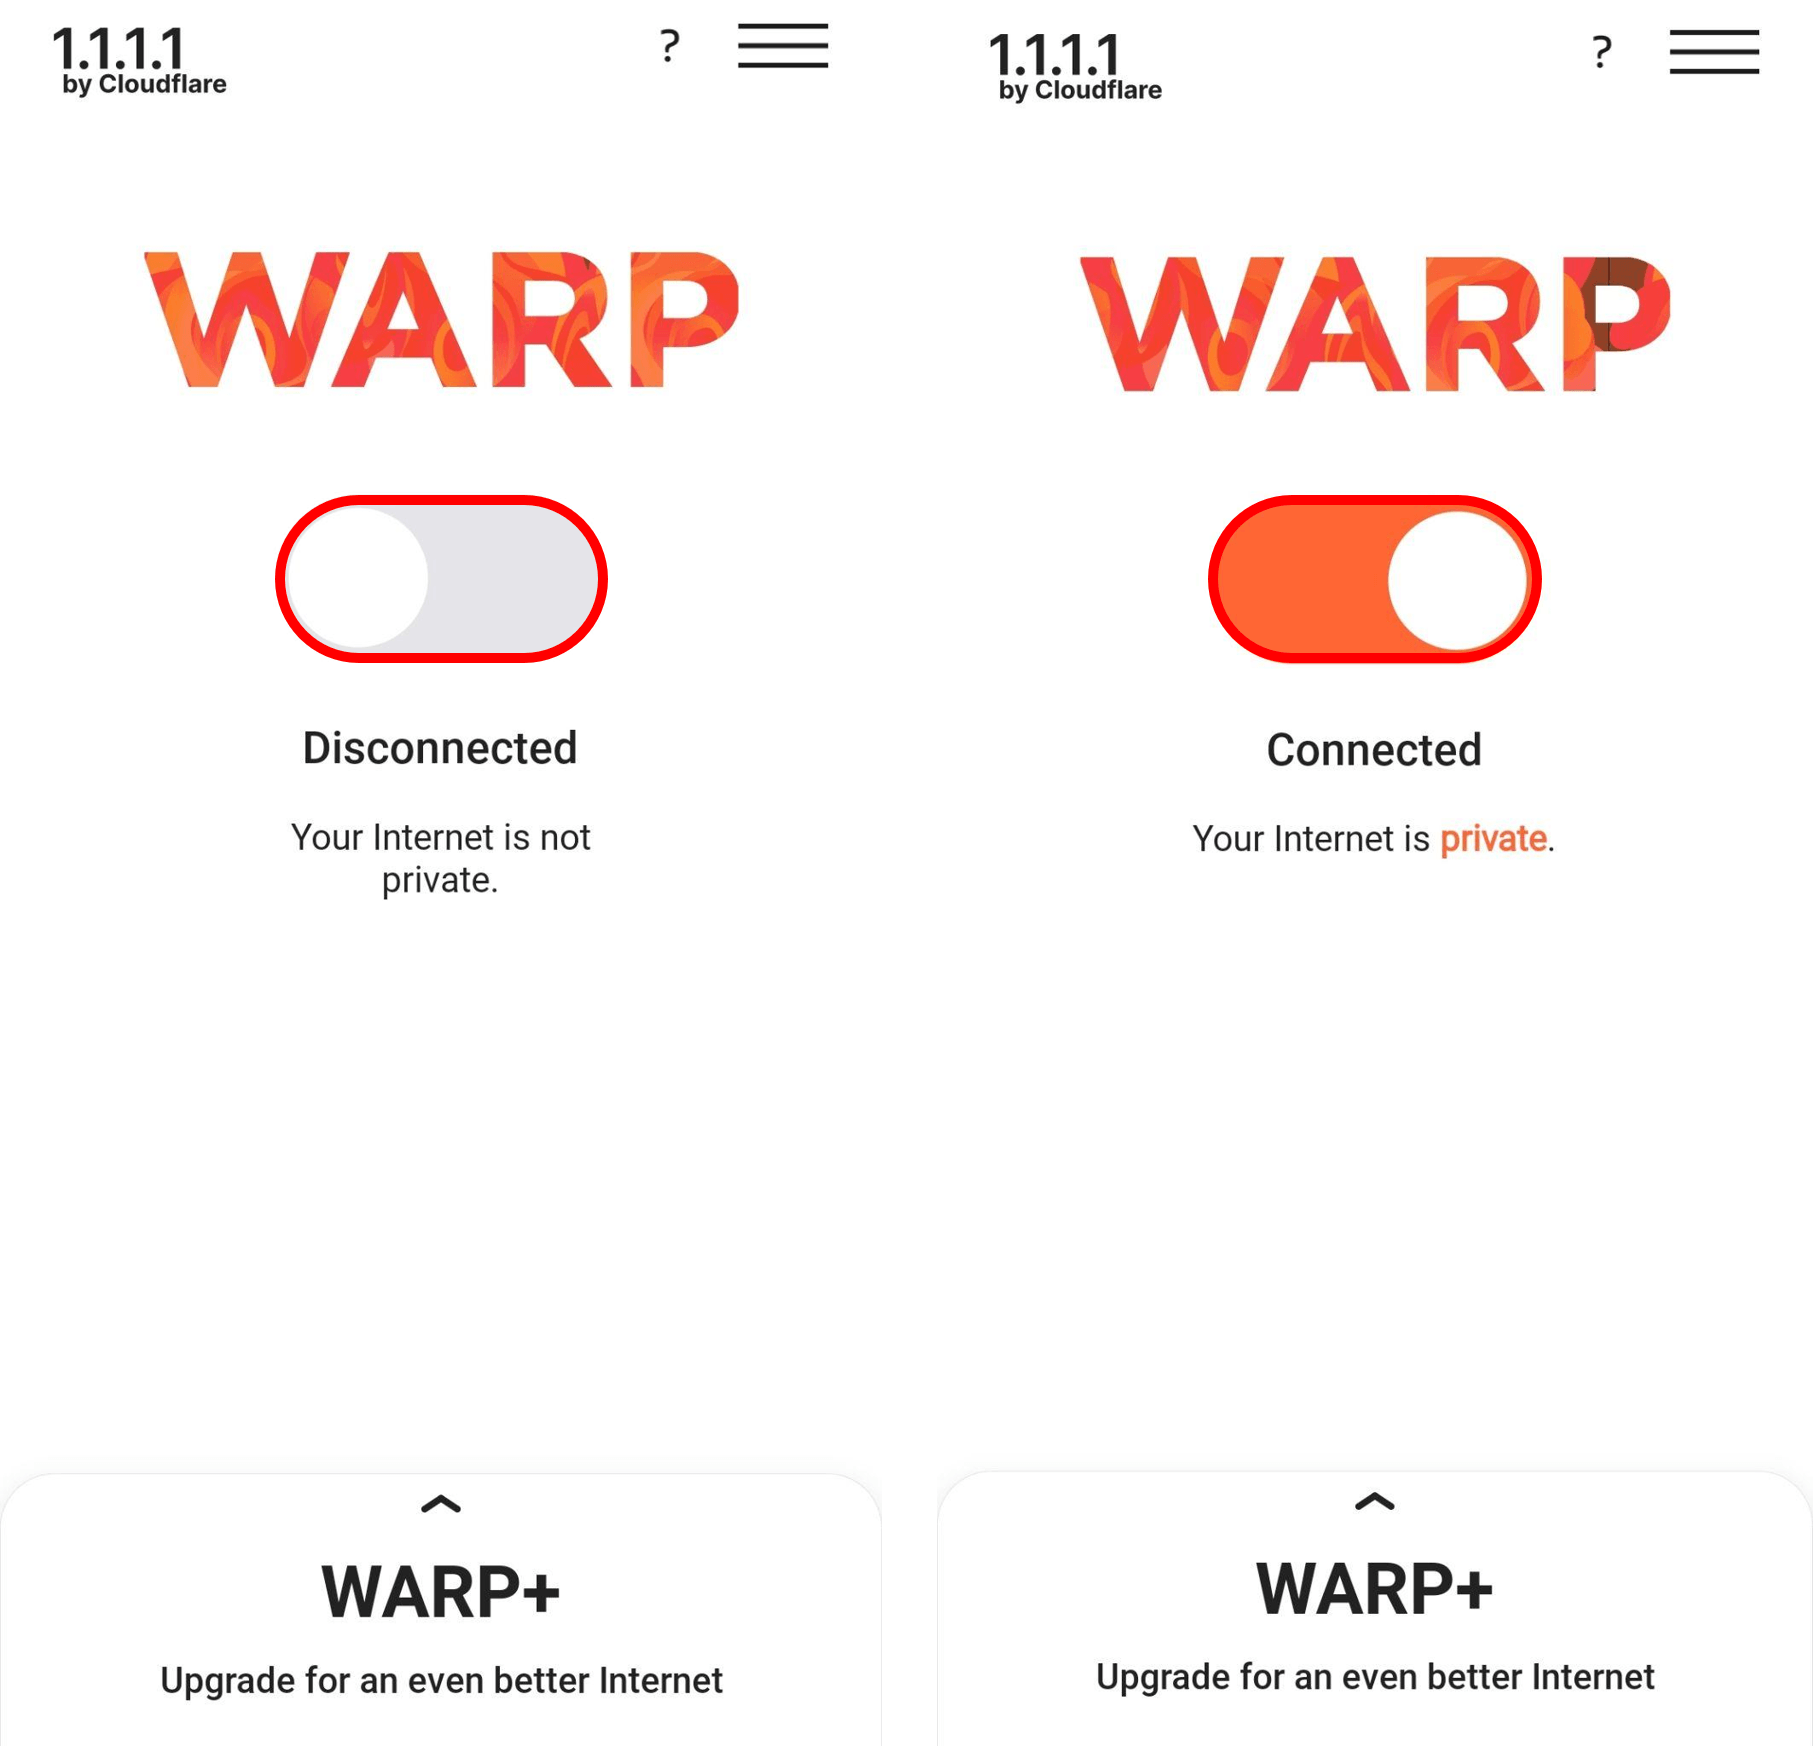
A confirmation pop-up will appear. After this step, the application is fully set up and ready to use.

Note:
- Please ensure you have a stable internet connection before starting the installation.
- During setup, the application will request permission to create a VPN profile. This is required for the app to function properly.
- 1.1.1.1 WARP is free to use. However, additional premium features are available under the WARP+ plan.
(Desktop Version)
To help you enjoy a faster, safer, and more private internet connection, Cloudflare provides the 1.1.1.1 WARP application.
This step-by-step guide will walk you through the process of downloading, installing, and setting up the app on your device.
Step 1:
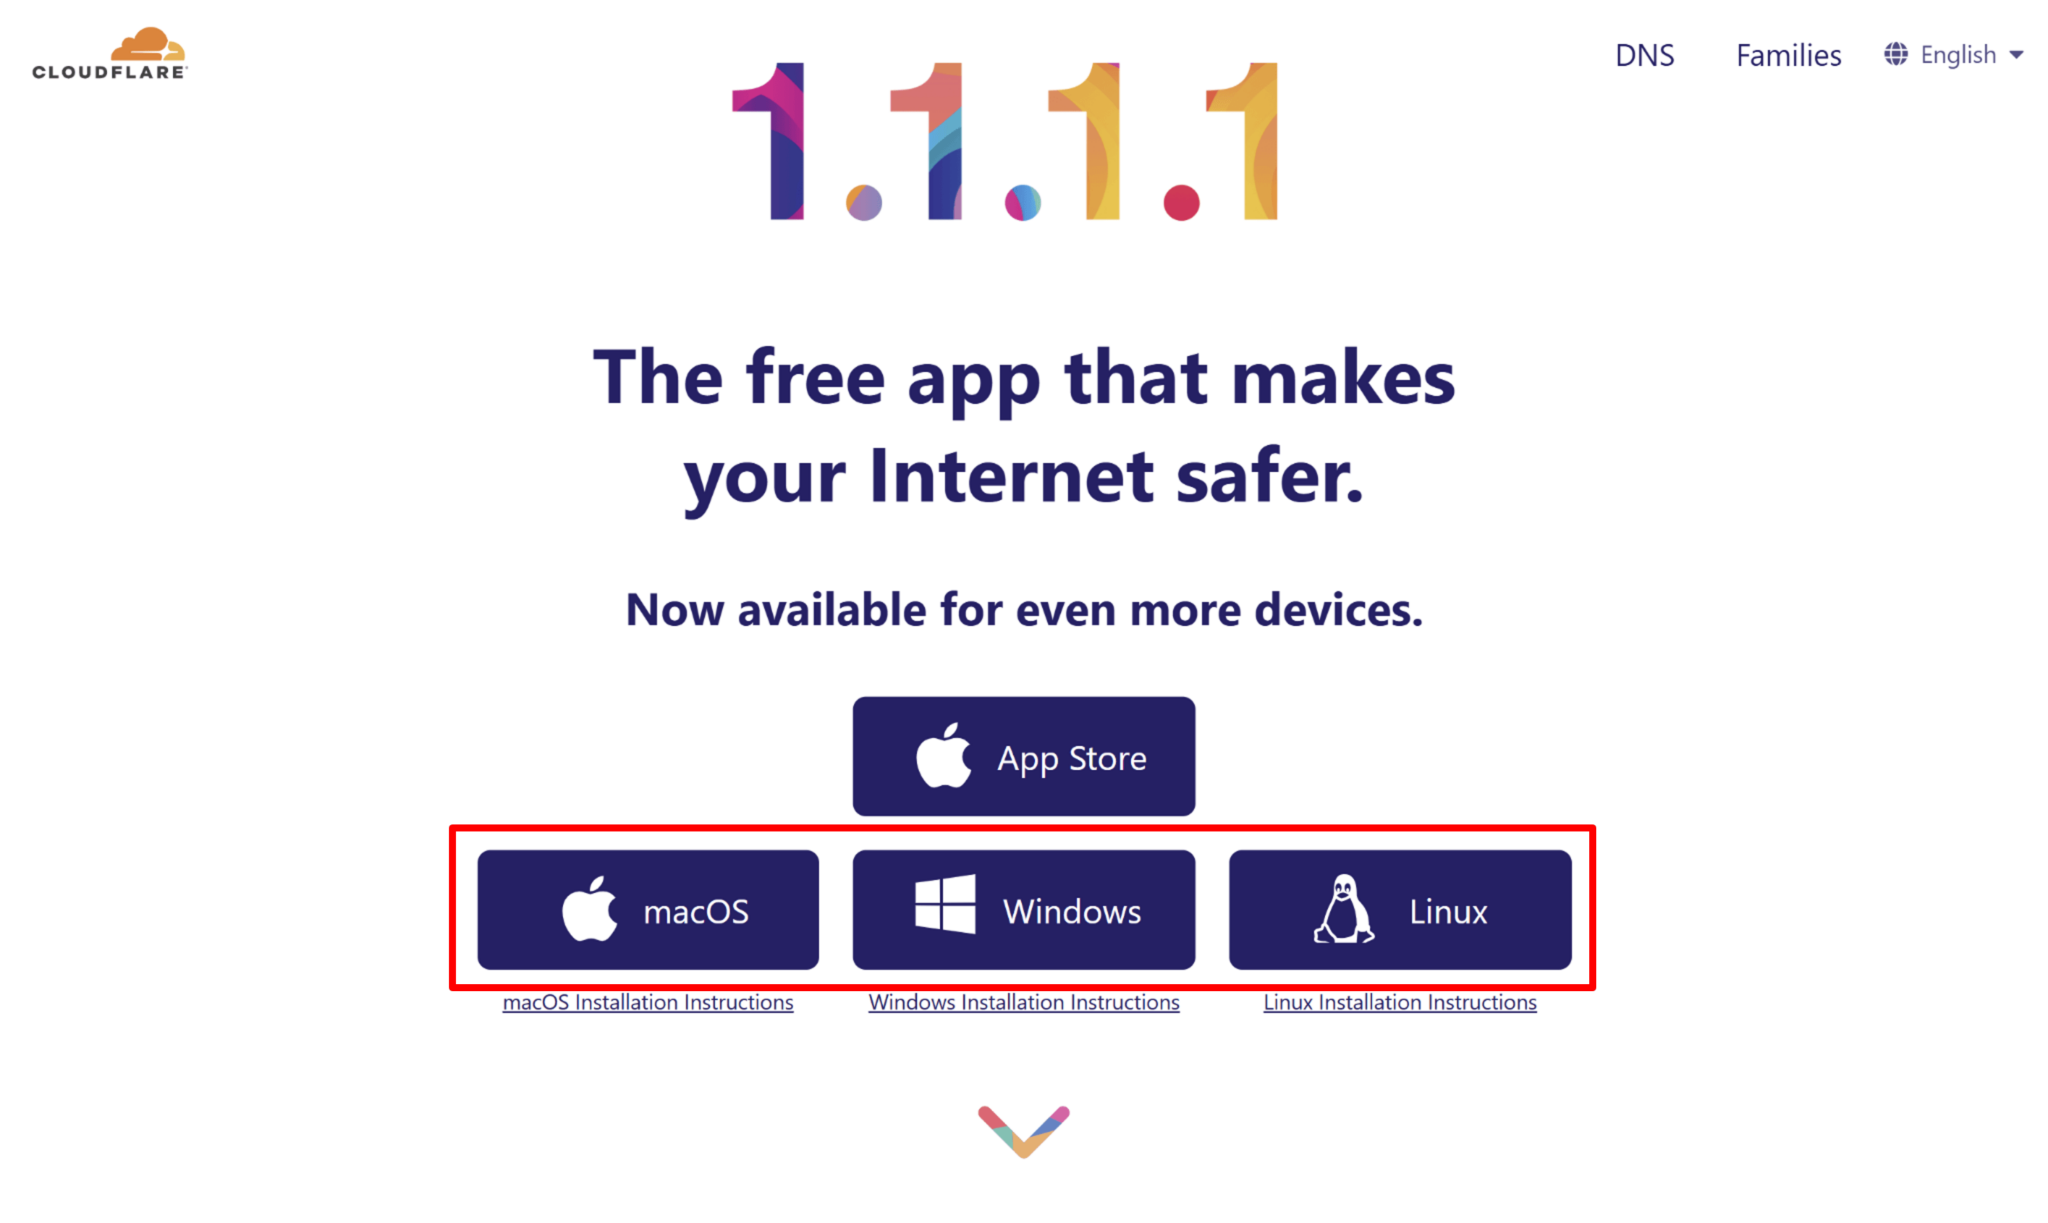
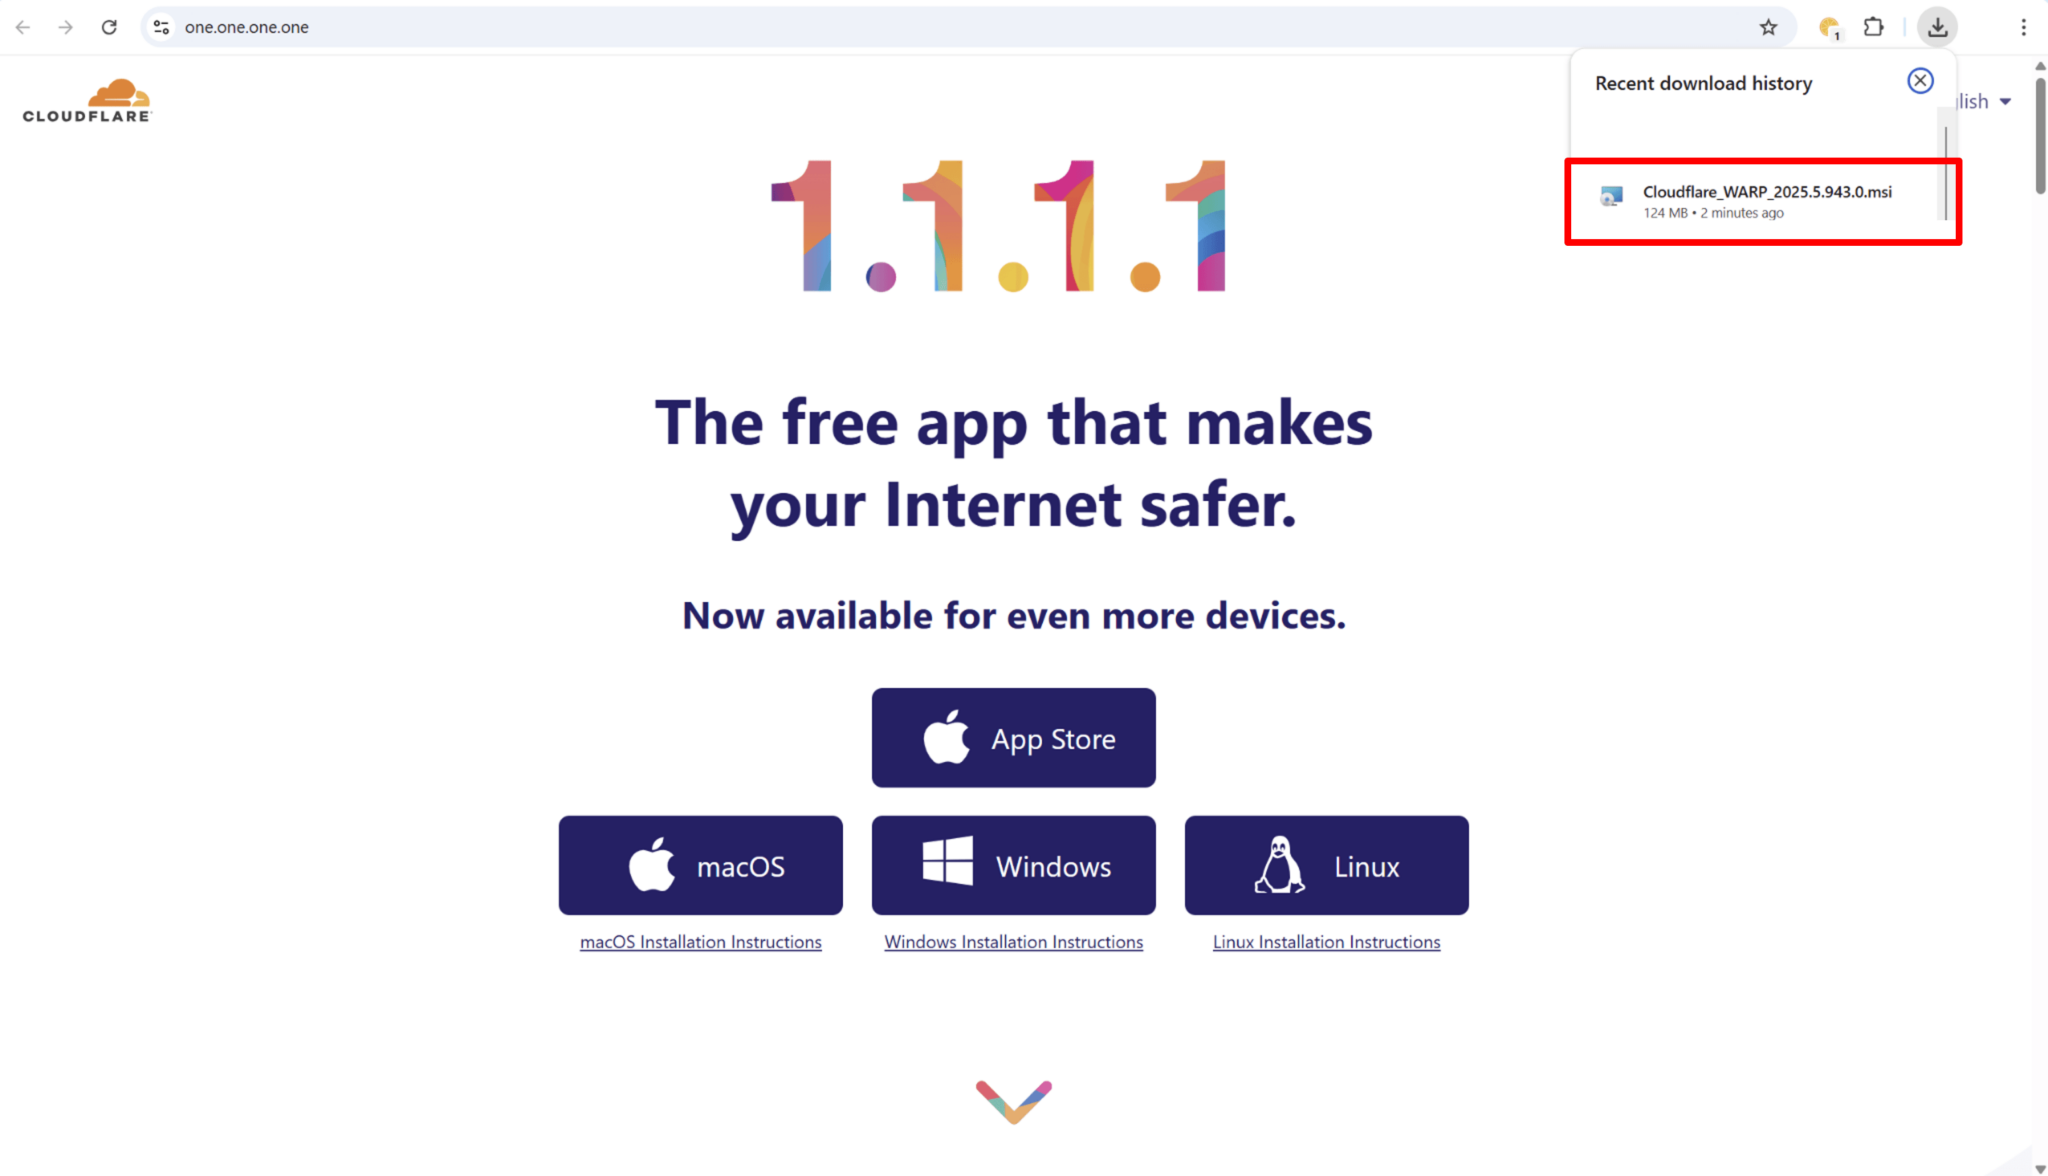
Go to the official Cloudflare 1.1.1.1 website at https://one.one.one.one/ and select the appropriate version for your desktop operating system (Windows or macOS).
Step 2:
After the download and installation process is complete, launch the application.
Step 3:
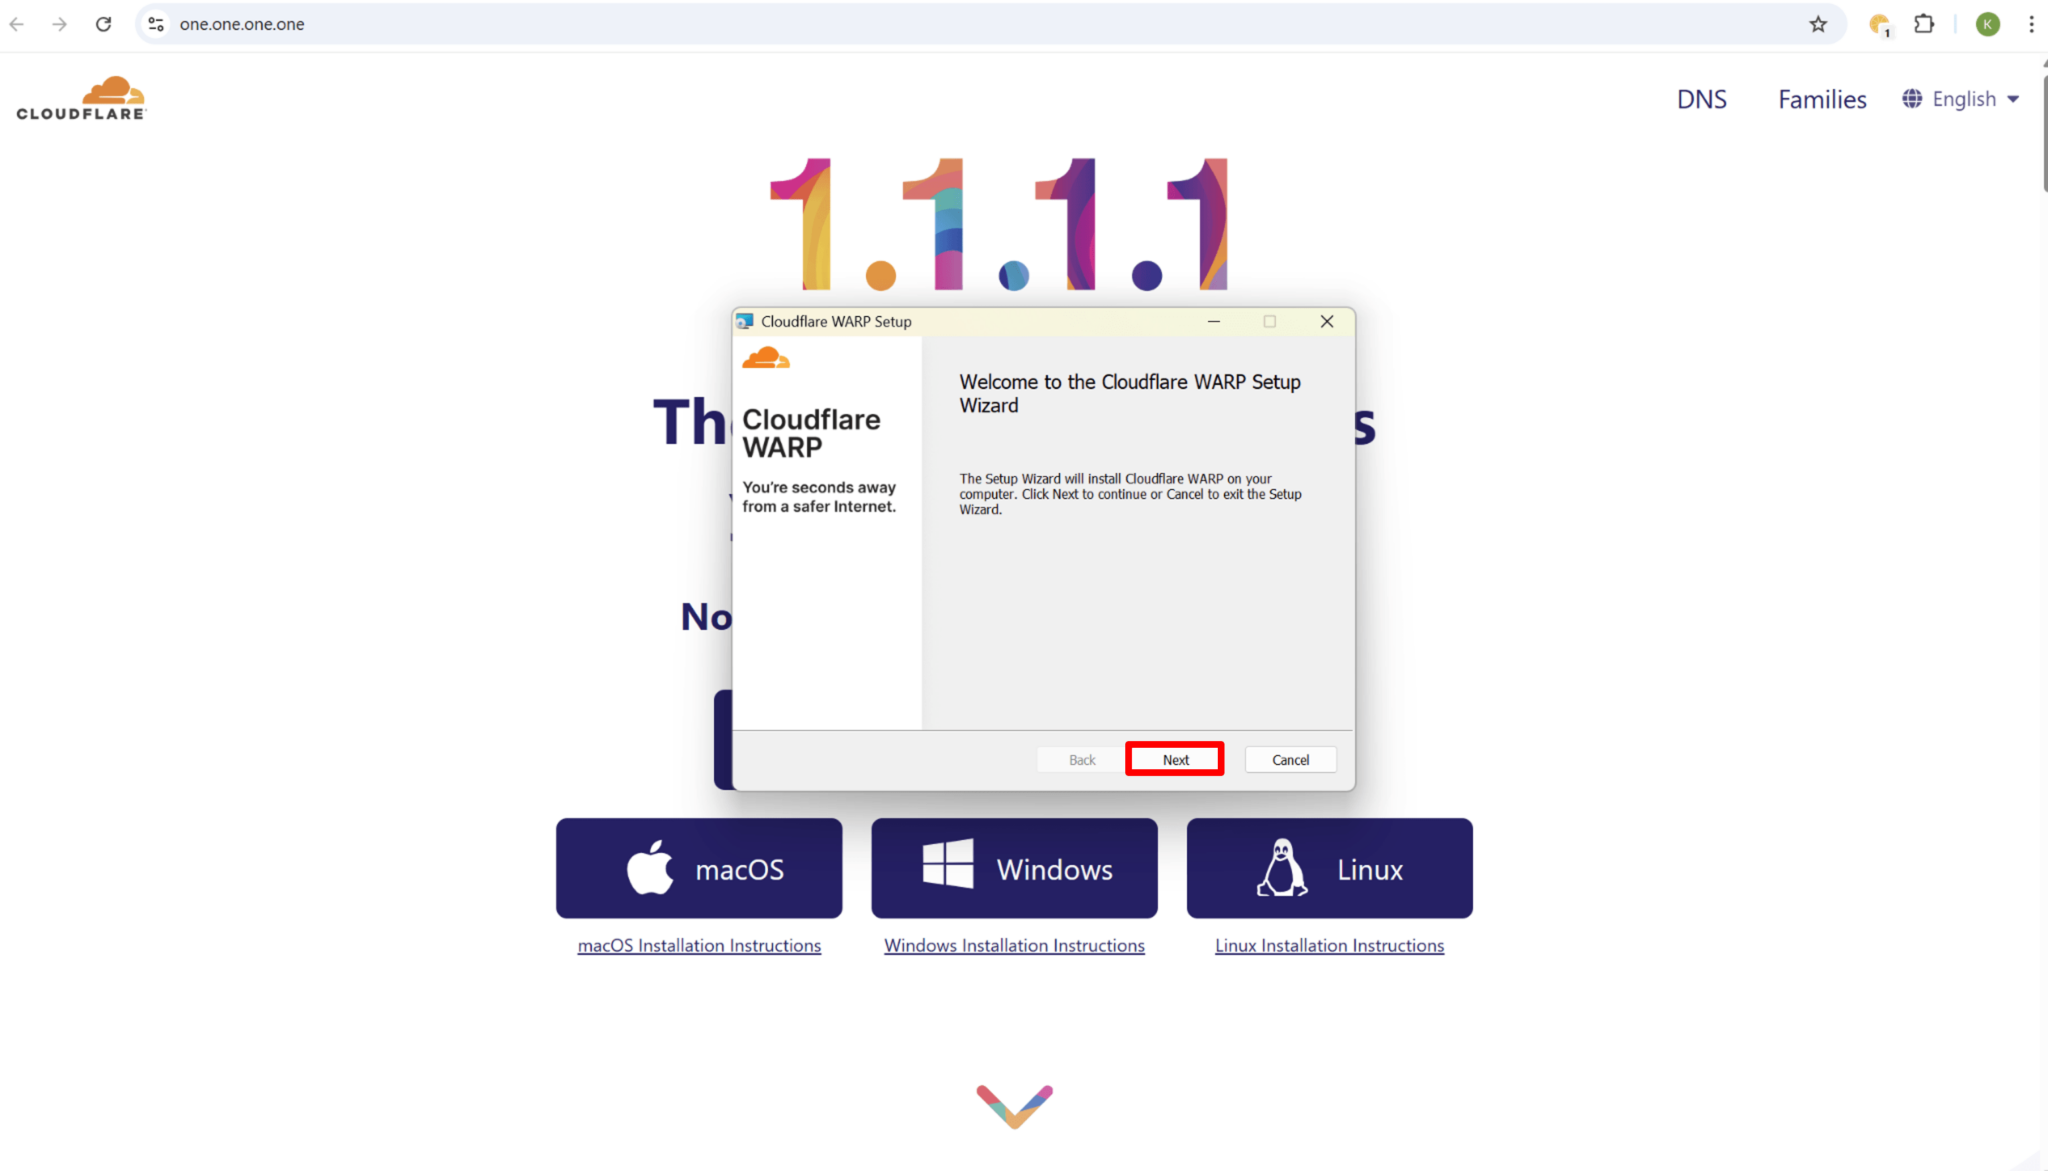
Click Next to begin the initial setup of Cloudflare WARP.
Step 4:
When prompted, click Install to continue with the installation.
Step 5:
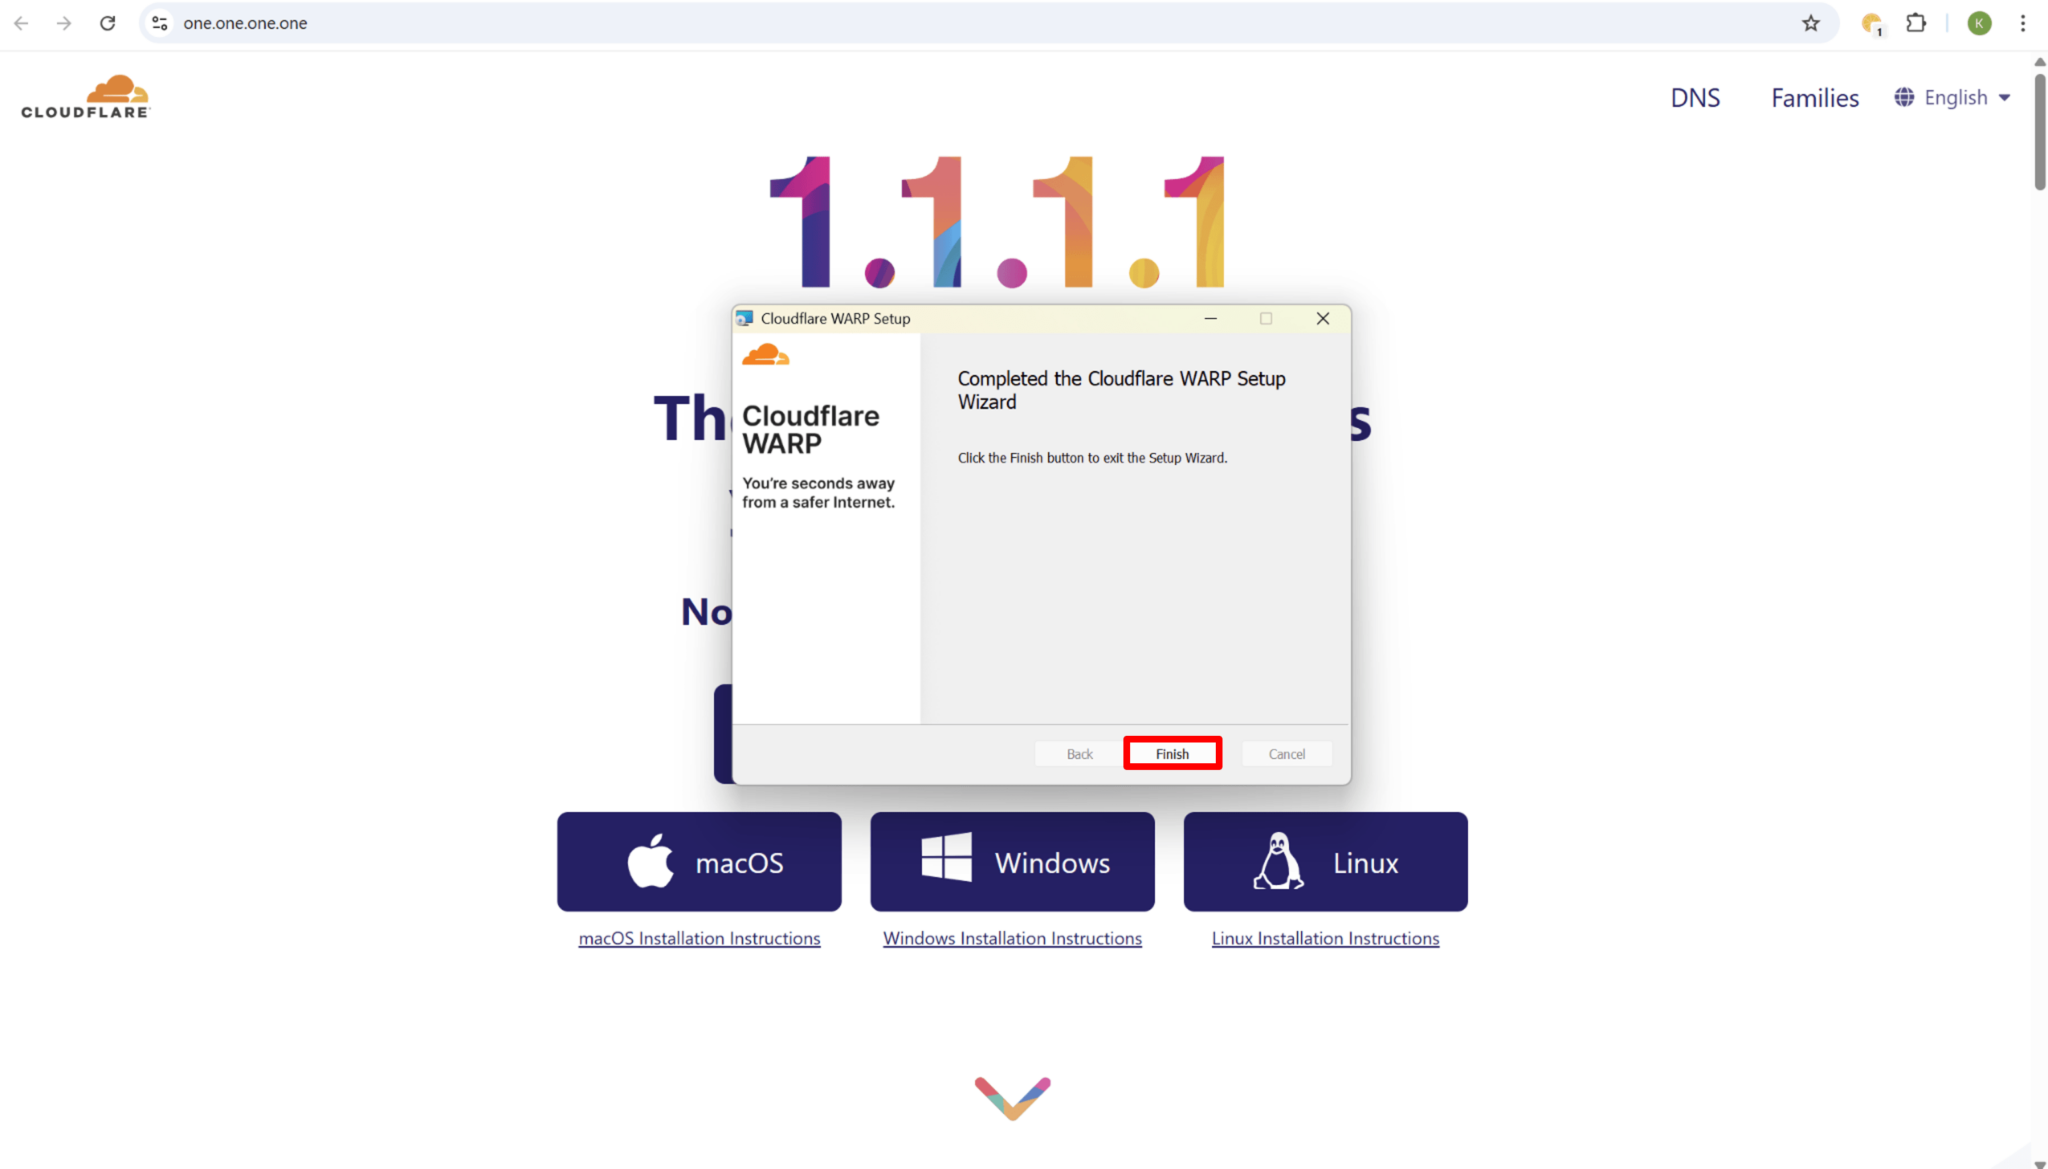
Once the installation has finished, click Finish to complete and exit the installer.
Step 6:
A new pop-up window will appear. Click Next to proceed.
Step 7:
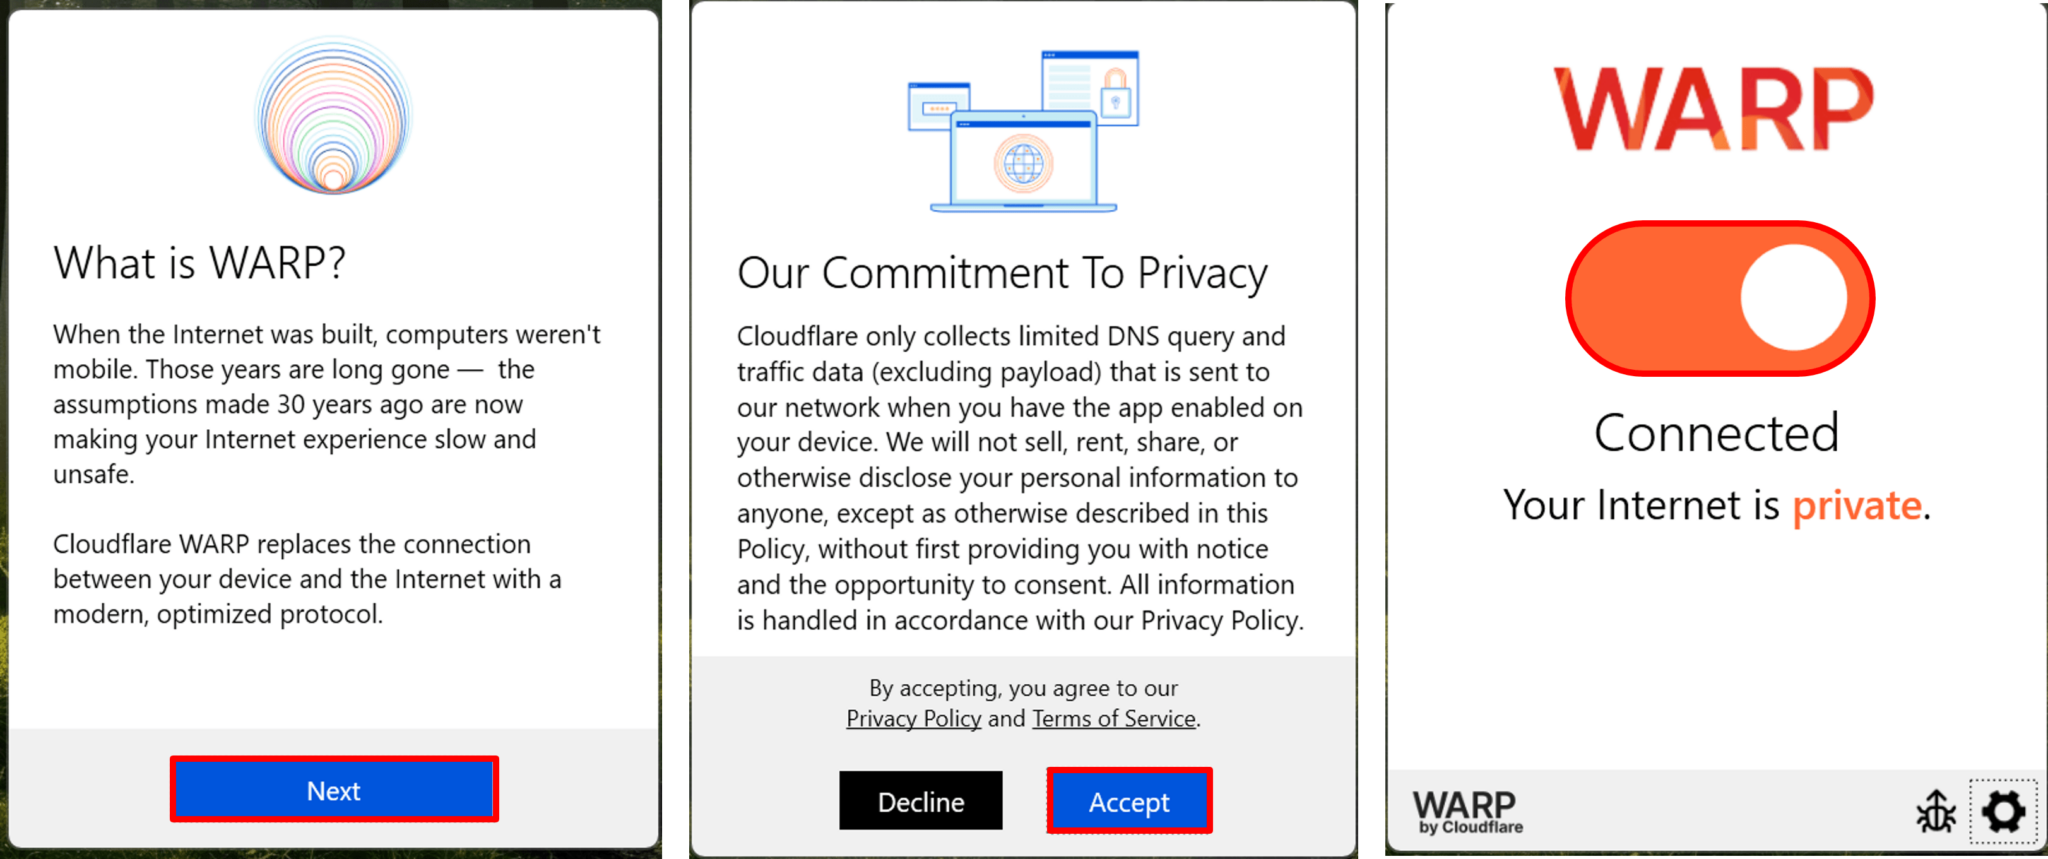
Review the Privacy Policy and Terms of Service, then click Accept to confirm and continue.
Step 8:
The application is now successfully installed and ready to use.

Note:
- Please ensure you have a stable internet connection before starting the installation.
- During setup, the application will request permission to create a VPN profile. This is required for the app to function properly.
- 1.1.1.1 WARP is free to use. However, additional premium features are available under the WARP+ plan.
(Google Chrome Version)
To ensure a safer and faster browsing experience, you can configure your Chrome browser to use a secure DNS provider such as Google Public DNS or Cloudflare 1.1.1.1.
This guide provides clear, step-by-step instructions on how to set up DNS within Google Chrome.
Step 1:
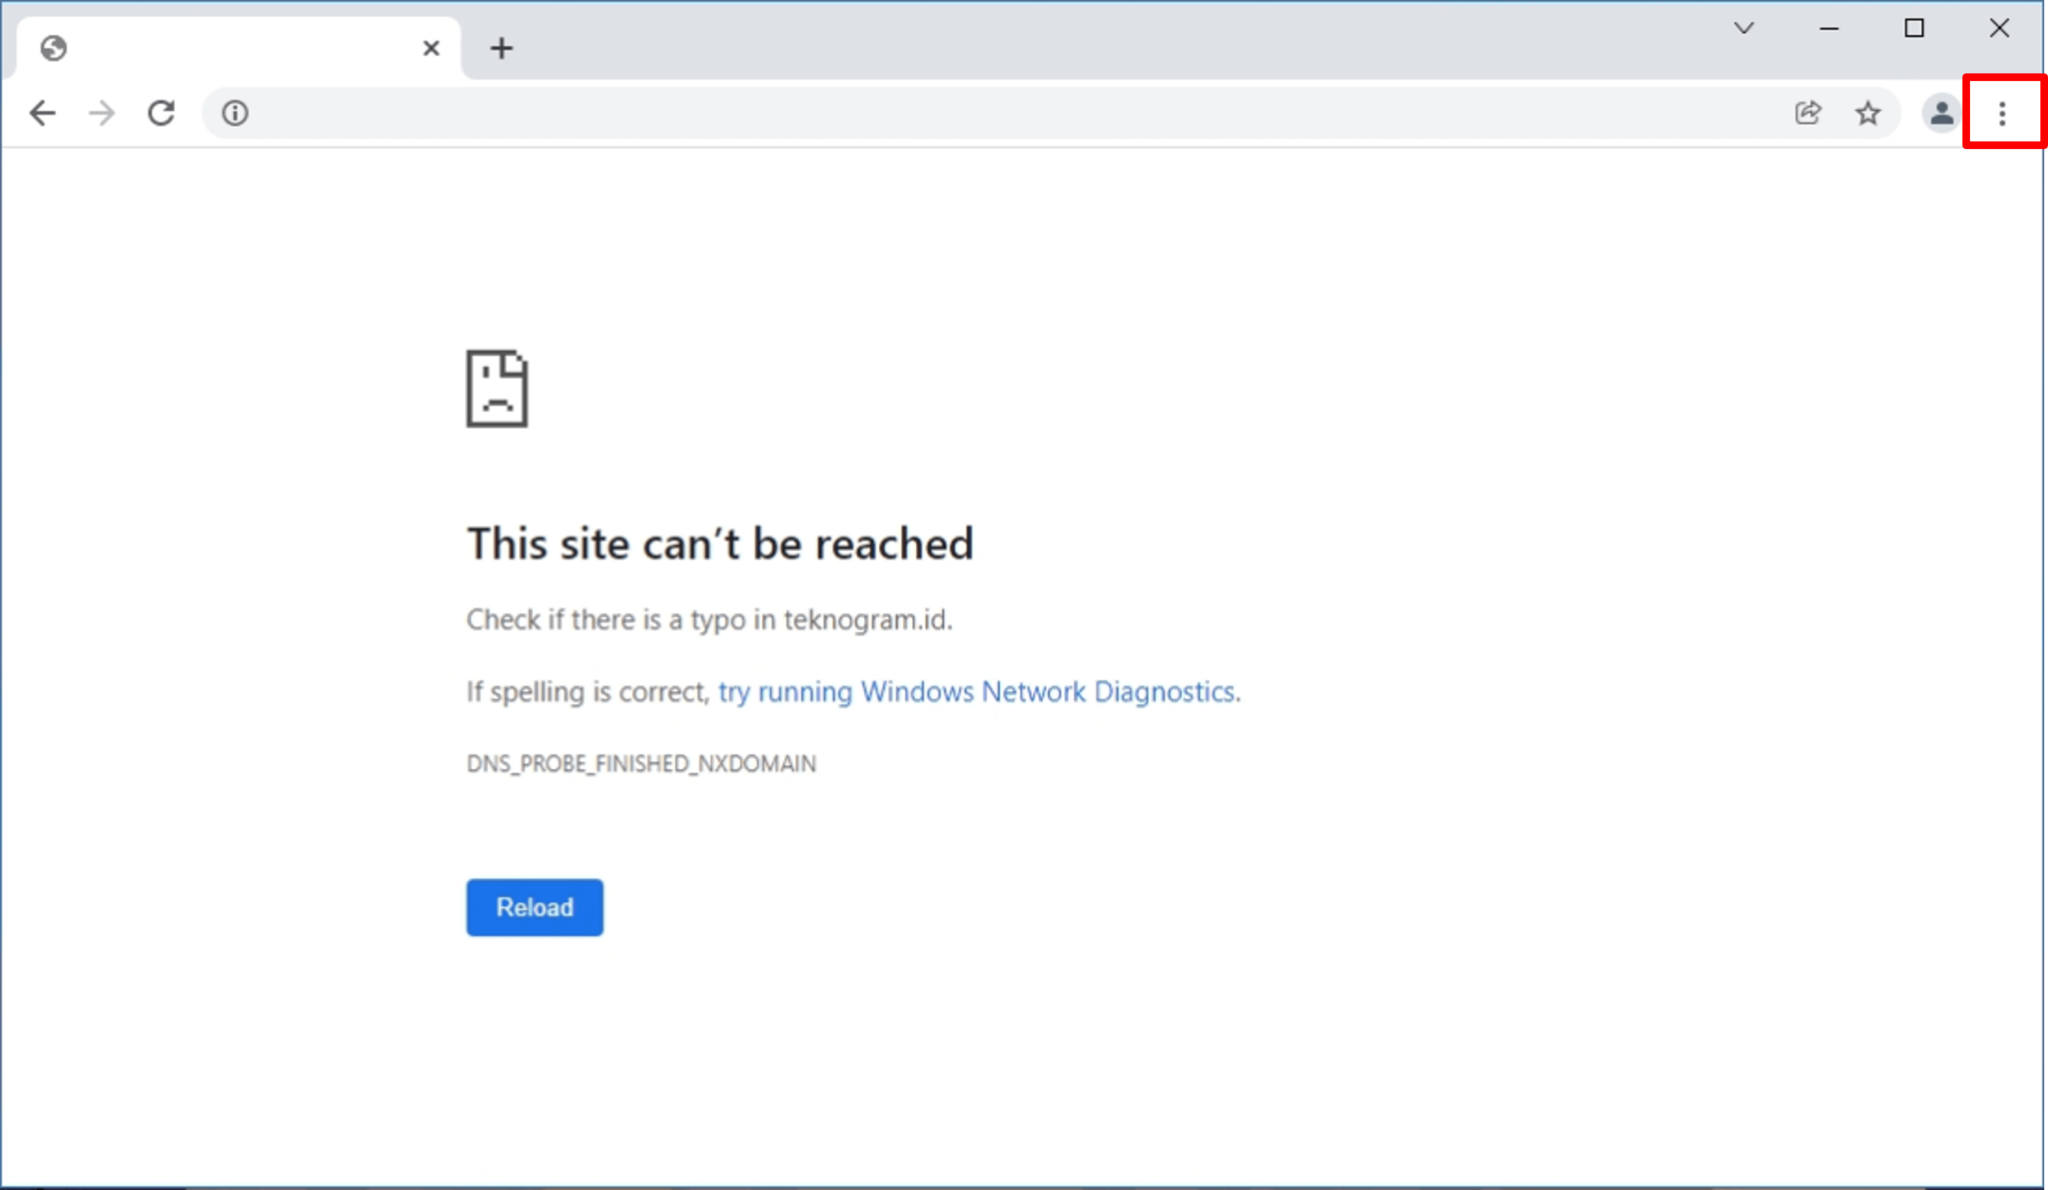
Click the three-dot menu icon located in the top-right corner of your Chrome browser.
Step 2:
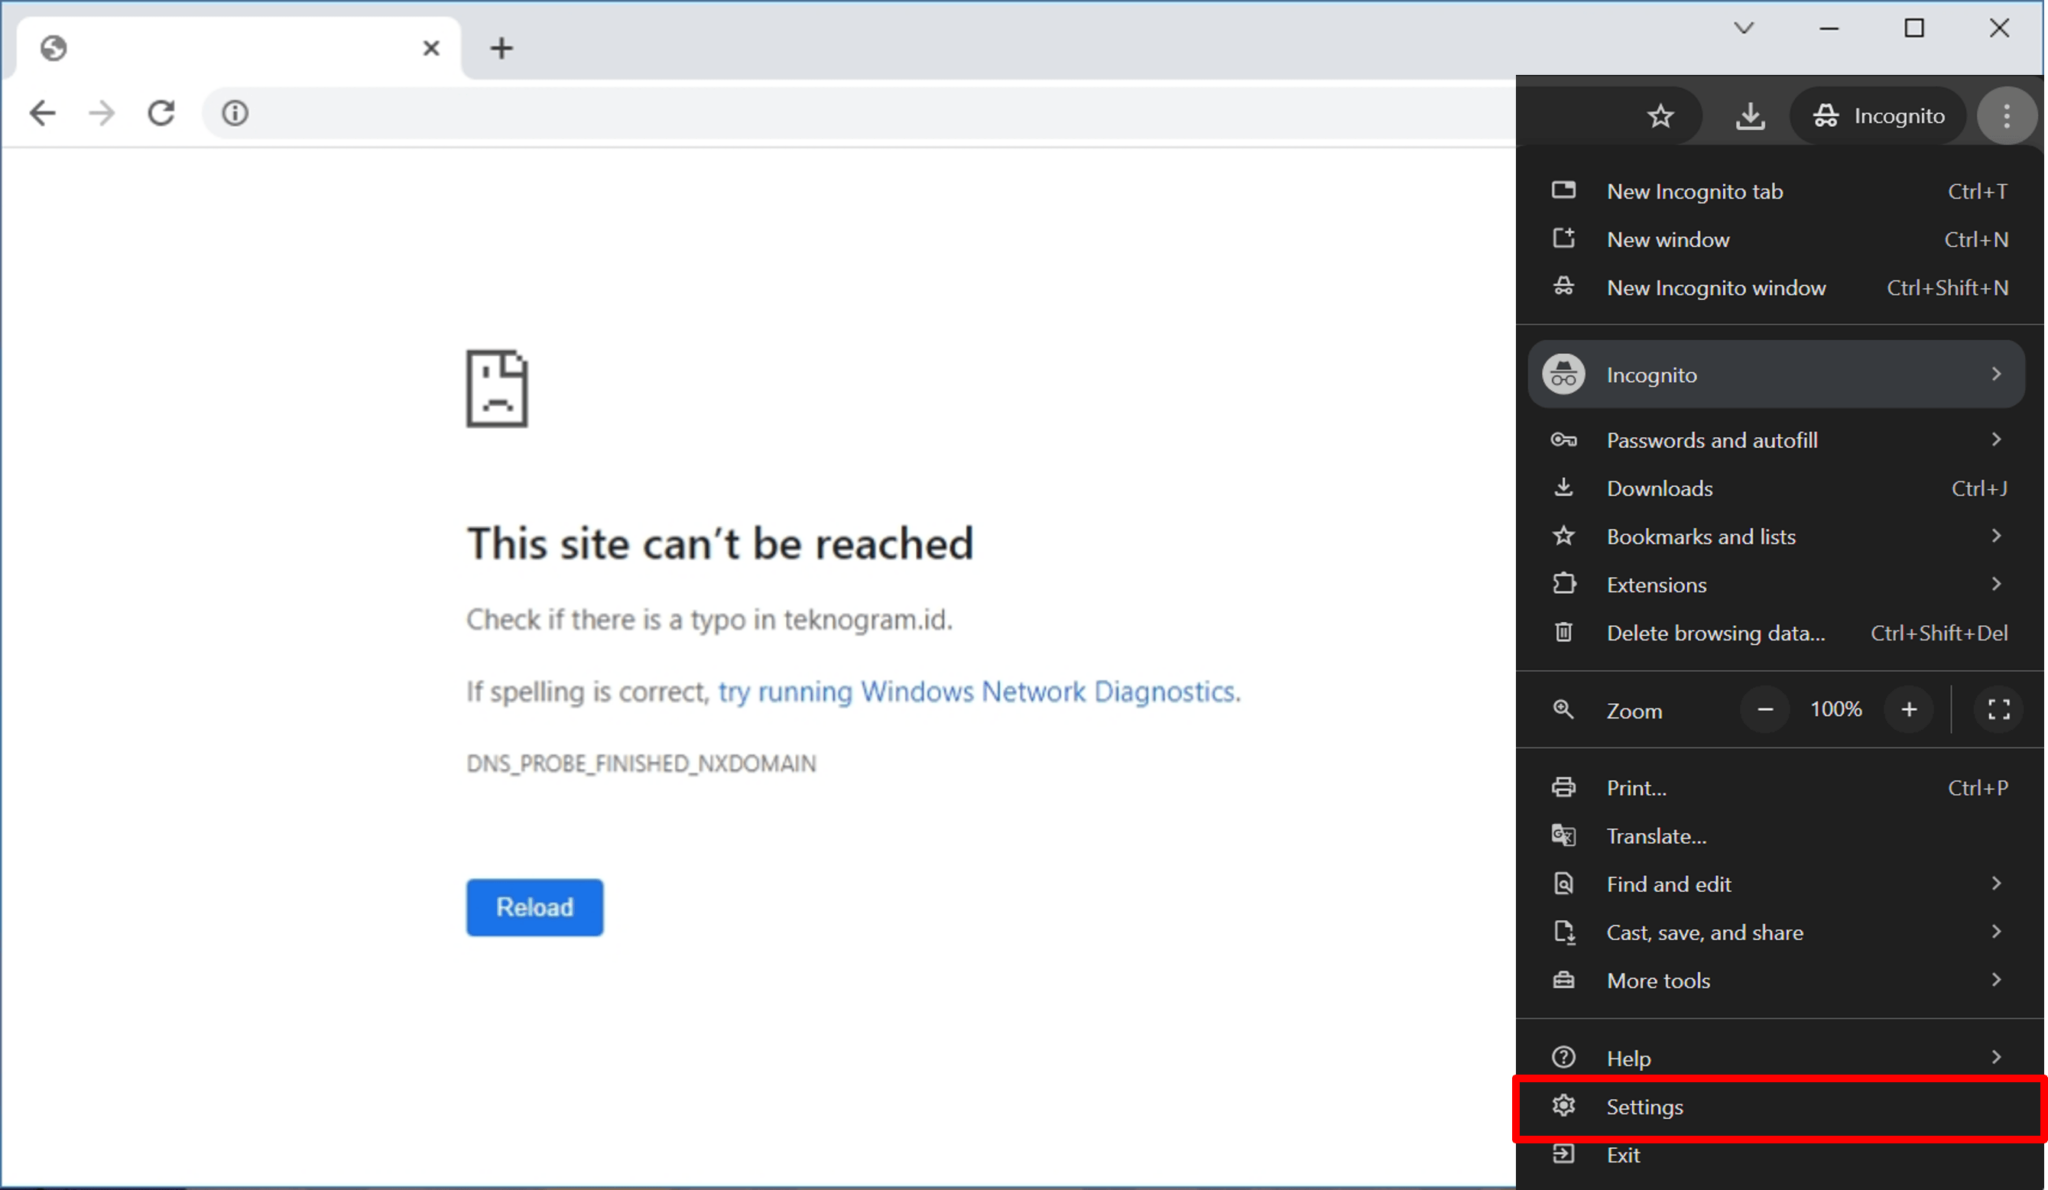
Select ‘Settings’ from the dropdown menu.
Step 3:
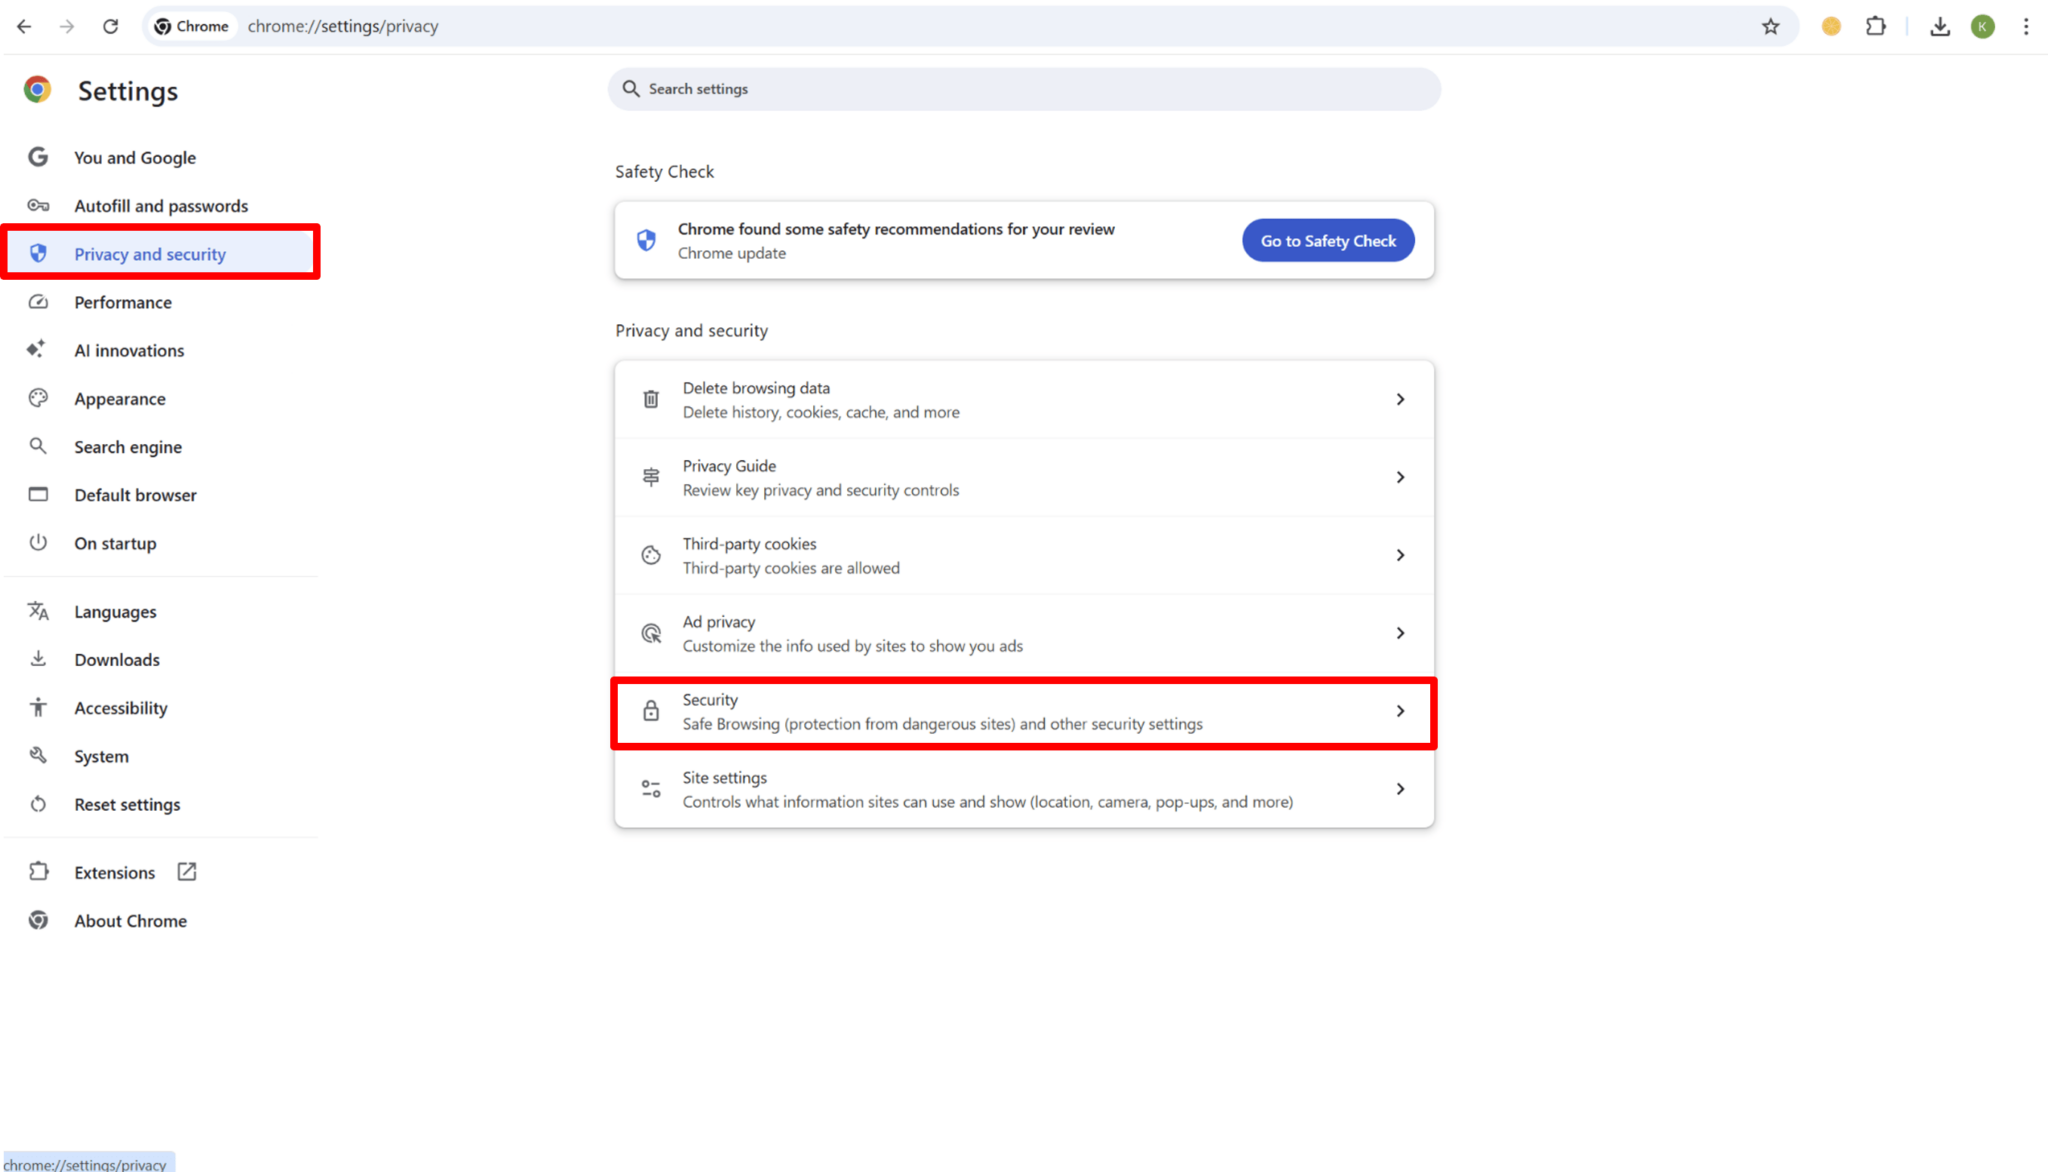
In the left-hand panel, click ‘Privacy and security’.
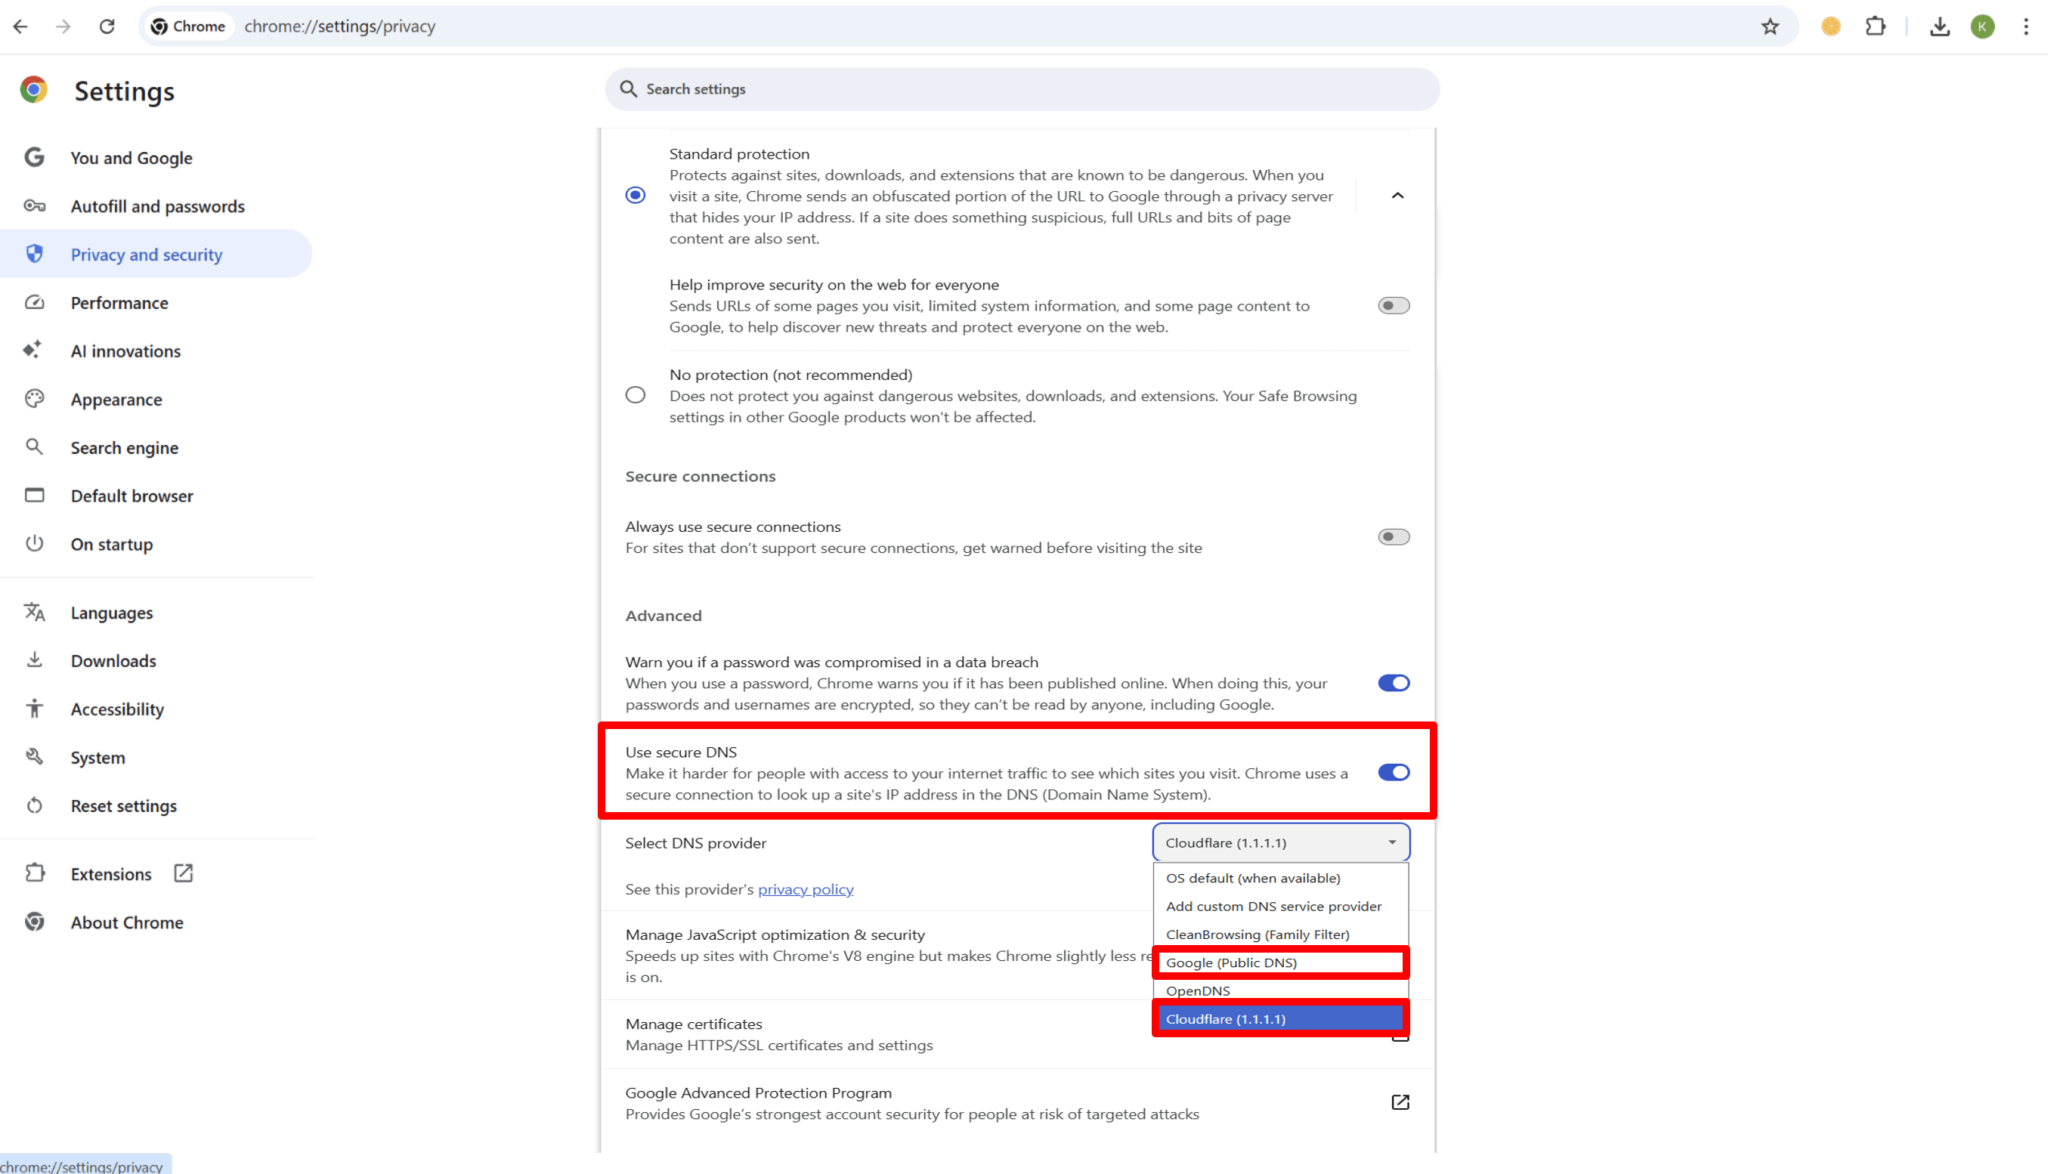
Step 4:
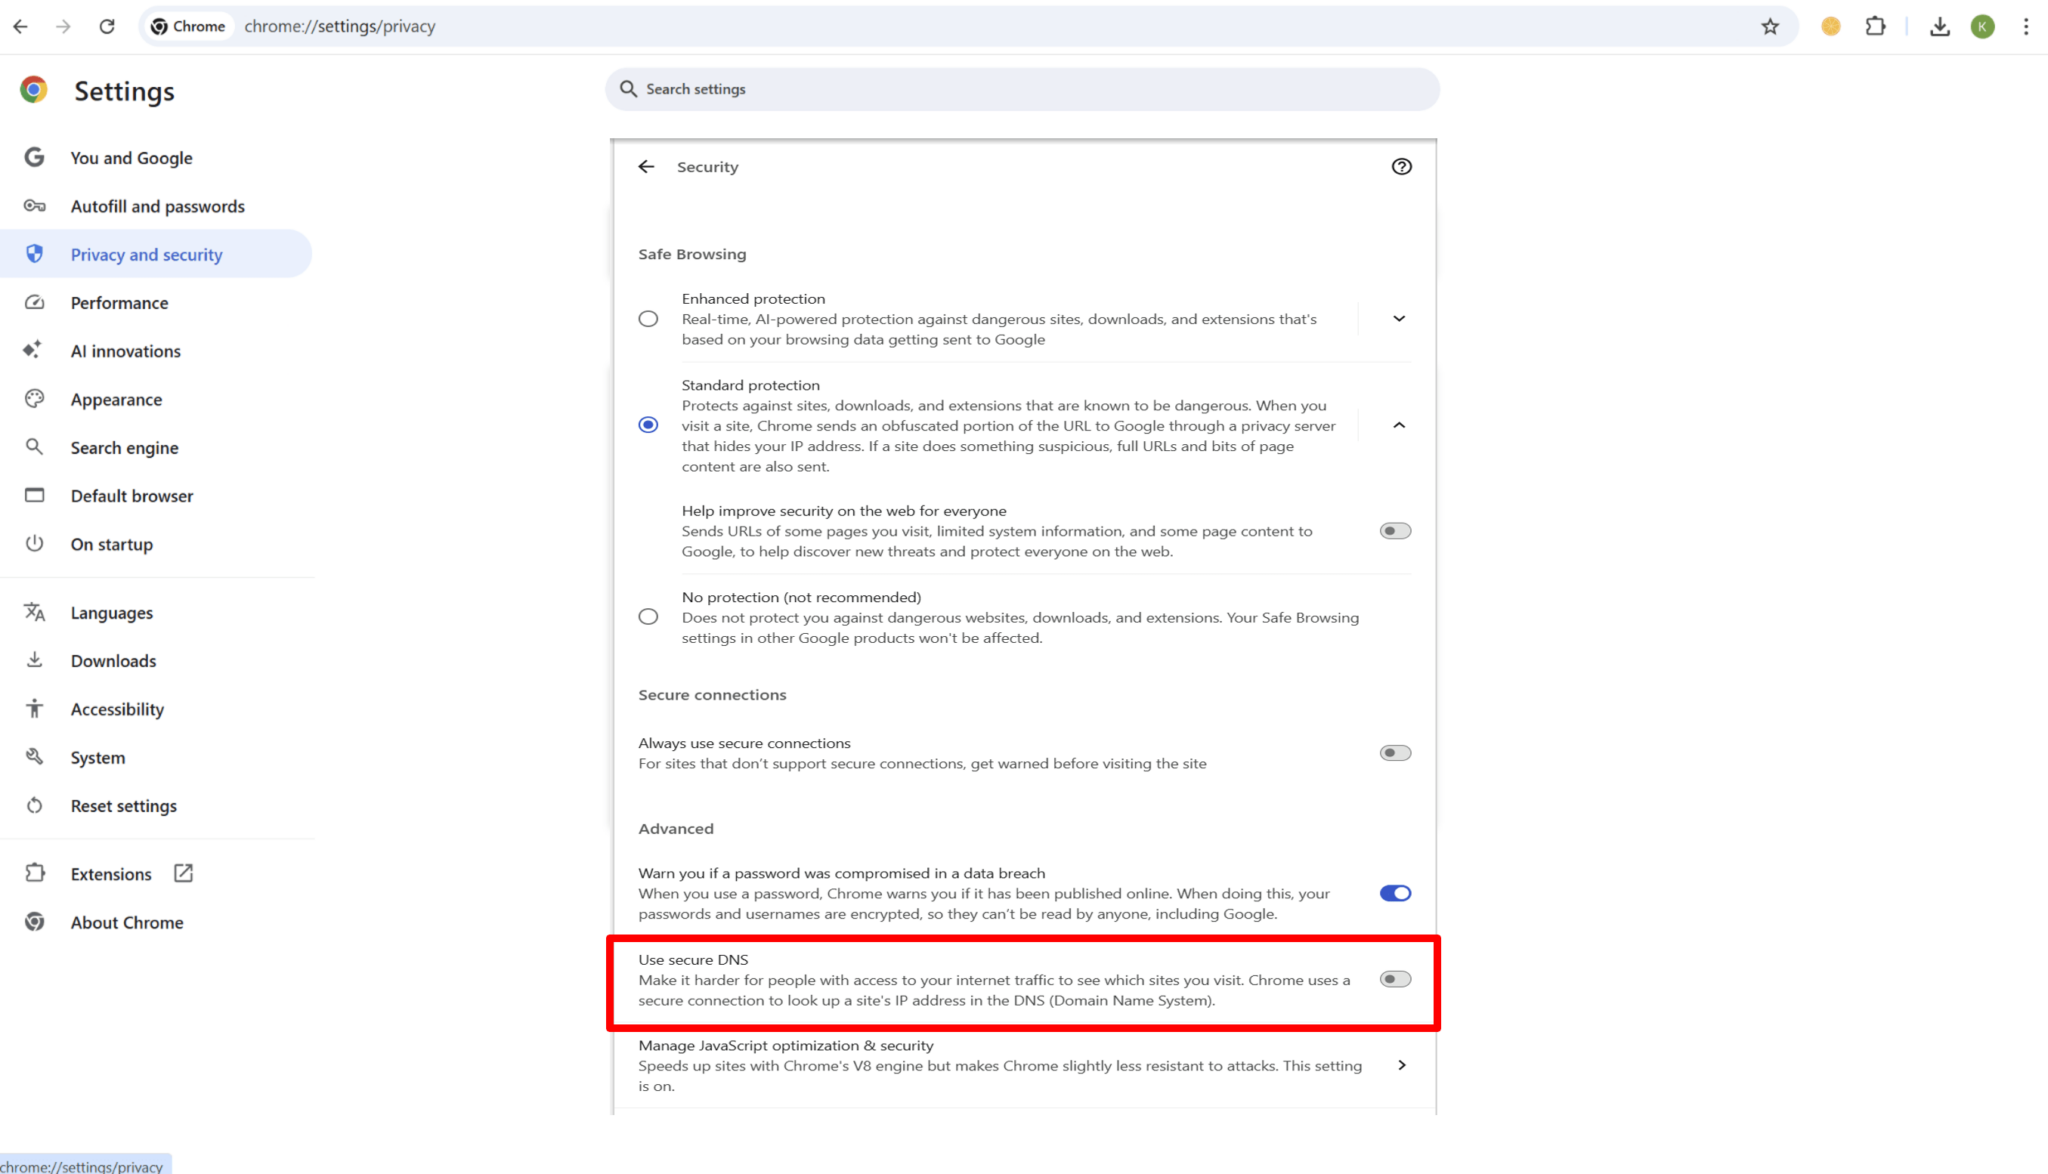
Scroll down and select ‘Use secure DNS’.
Step 5:
Click the dropdown menu under ‘Select a provider’, then choose either:
- Google (Public DNS)
- Cloudflare (1.1.1.1)
Step 6:
Once selected, refresh your Chrome browser. From now on, all your browsing activities will use the chosen DNS provider for improved speed and security.
Note:
- Please ensure your Chrome browser is updated to the latest version before making these changes.
- If you are connected to a workplace or school network, the DNS settings may be managed by the administrator, and changes might not take effect.
- Using Cloudflare (1.1.1.1) or Google Public DNS can help improve browsing speed and security, but actual performance may vary depending on your internet service provider.
